

A skill saw Guide can turn a full sheet of plywood into cabinet parts, shorten framing lumber, trim a door, or build a backyard deck. It can also ruin an expensive board—or cause a serious injury—when the blade, setup, or cutting technique is wrong. The tool is simple, but using it well requires more than pulling a trigger and following a pencil line.
For most U.S. homeowners, DIYers, and construction professionals, a handheld circular saw offers the best balance of portability, cutting capacity, and value. The right model can handle much of the work people assume requires a table saw or miter saw. The key is choosing the correct drive style, power source, blade, and support method for the work you actually do.
This guide explains what a skill saw is, how it differs from other saws, what features matter, how to make accurate cuts, and how to avoid kickback and other common hazards.
Quick answer: A Skill Saw Guide is the common informal name for a handheld circular saw. For general DIY and construction work, a 7-1/4-inch model is the most versatile choice. Use a sharp blade made for the material, set the blade only slightly deeper than the workpiece, support both sides of the cut correctly, and keep the lower guard working freely.
What Is a Skill Saw?
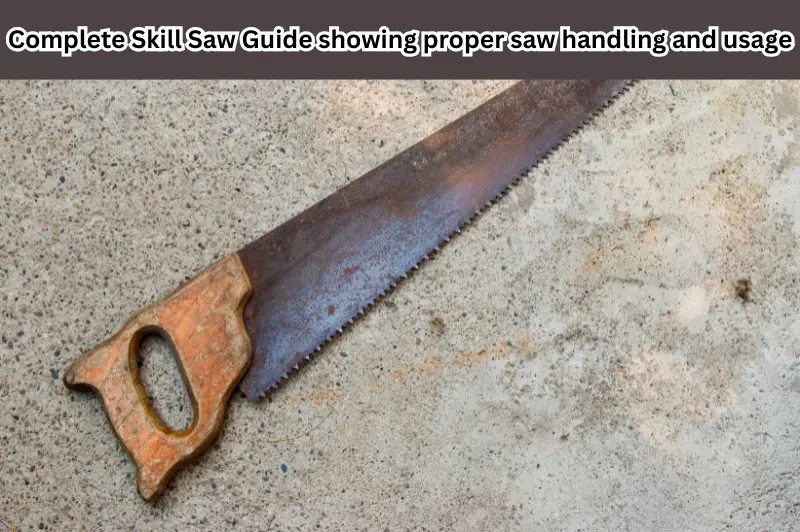
A skill saw is a handheld power saw that uses a round, toothed blade to make straight cuts. The blade projects through an adjustable metal base—often called the shoe—and spins as the user guides the saw across stationary material.
Technically, circular saw is the product category.
Skill Saw Guide is a brand name associated with the early portable circular saw. Over time, many people began using “skill saw” as a generic term, much as some brand names become everyday names for an entire product type. In stores, manuals, and safety documents, “circular saw” is the more precise term.
What can a Skill Saw Guide cut?
With the right blade, a circular saw can cut:
- Dimensional lumber such as 2x4s, 2x6s, and joists
- Plywood, oriented strand board, and other sheet goods
- MDF, particleboard, and melamine panels
- Pressure-treated lumber and composite decking
- Some plastics and laminates
- Skill Saw Guide is a brand name
- Nonferrous metal or steel, but only with a saw and blade approved for that material
- Fiber-cement products with an appropriate blade and dust-control method
Never assume that changing the blade makes every saw suitable for every material. Check the saw manual, blade label, required revolutions-per-minute rating, and dust or spark hazards first.
Why a Skill Saw Guide Still Belongs in a Modern Workshop
A circular saw brings the tool to the work. Unlike a table saw, it does not require you to push a 4-by-8-foot sheet or long board across a fixed blade.
Its main advantages are:
- Portability: It works in a garage, on a jobsite, or outdoors.
- Versatility: One saw can make crosscuts, rip cuts, bevels, and controlled plunge cuts.
- Cutting capacity: A typical 7-1/4-inch model can cut through common framing lumber at 90 degrees in one pass.
- Lower space requirement: It is practical for people without room for stationary machines.
- Guide compatibility: A straightedge, speed square, or track-style guide can significantly improve accuracy.
The tradeoff is that you control the path. Furniture-grade results depend on blade quality, stable support, accurate marks, and a guide.
Understand the Main Parts Before You Cut
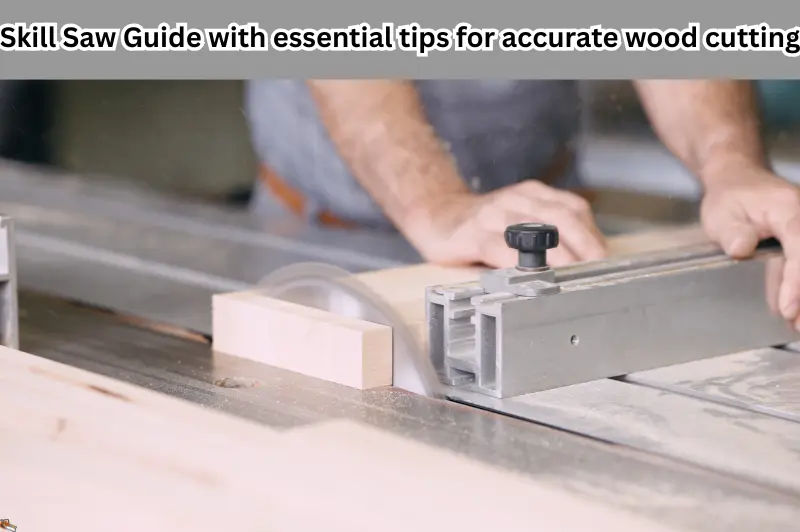
The shoe rests on the work and tilts for bevels. Depth and bevel levers must lock firmly. The upper guard covers the top of the blade, while the spring-loaded lower guard retracts during a cut and closes afterward. Check that it returns immediately every time.
The trigger, front grip, arbor lock, cut-line notches, and dust port vary by model. Locate each before connecting power, and verify cut-line markings on scrap. OSHA requires upper and lower guards on portable circular saws used in covered workplaces; home users should follow the same core principle: never remove, tie back, or defeat a guard.
How to Choose the Right Skill Saw Guide
The best skill saw is not automatically the most powerful or expensive model. It is the one you can control confidently while completing your normal cuts without overloading it.
Corded vs. cordless Skill Saw Guide
| Factor | Corded saw | Cordless saw |
|---|---|---|
| Best for | Long sessions, shop use, repetitive heavy cuts | Mobile work, quick repairs, jobs without nearby outlets |
| Power delivery | Consistent while connected to adequate power | Depends on battery charge, capacity, temperature, and platform |
| Weight | Often lighter because there is no battery | Battery can add weight, though compact models may be light |
| Runtime | Effectively unlimited | Limited by battery size and spare packs |
| Mobility | Extension cord requires management | Excellent |
| Long-term cost | Usually lower entry cost | Better value if you already own compatible batteries |
A corded saw suits a garage shop, renovation, or frequent cutting in one place. Cordless is convenient for repairs, fencing, roof work, and sites where cords create hazards.
For cordless models, look beyond voltage: battery capacity, motor efficiency, blade sharpness, and heat management affect performance. An existing battery platform can make the best overall value.
Sidewinder vs. worm-drive Skill Saw Guide
The motor orientation changes the tool’s balance, torque delivery, and handling.
| Feature | Sidewinder/direct drive | Worm drive |
| Motor position | Beside the blade | Behind the blade |
| Shape | Shorter and more compact | Longer and narrower |
| Typical feel | Lighter, nimble, easy for general work | Forward-reaching, torque-focused, heavier |
| Best use | DIY, remodeling, sheet goods, overhead or repeated cuts | Framing, long rip cuts, demanding construction work |
| Maintenance | Generally simple | Some designs require gear-oil checks; follow the manual |
Most homeowners will find a sidewinder easier to handle. Worm drive suits demanding framing, but extra torque has little value if added weight reduces control.
Which blade size is best?
The 7-1/4-inch circular saw is the U.S. general-purpose standard because blades are widely available and it handles common framing material. Smaller cordless saws are lighter but may offer less depth and bevel capacity.
Choose for the thickest material you routinely cut, not the largest blade available.
Features worth paying for
Prioritize features that improve control:
- A rigid, flat shoe that does not flex under normal pressure
- Easy-to-reach adjustment levers that lock securely
- An electric brake that stops the blade more quickly after trigger release
- Effective dust ejection or a vacuum-compatible port
- A comfortable main grip and useful front handle
- Blade visibility that suits your dominant hand and normal cutting position
A light or laser is optional and cannot replace alignment. Dust can hide a beam, and guides can drift out of calibration.
How to Choose the Correct Circular Skill Saw Guide
Blade choice often affects cut quality more than the price of the saw. A sharp, appropriate blade requires less feed pressure, produces less tear-out, and is less likely to overheat or bind.
| Blade type | Typical tooth count for a 7-1/4-inch blade | Best use | Main tradeoff |
| Framing/ripping | 18–24 teeth | Fast cuts in construction lumber | Rougher edge |
| General purpose | 24–40 teeth | Mixed DIY and remodeling tasks | Not the fastest or finest option |
| Finish/plywood | 40–60 teeth | Cleaner cuts in plywood, trim, and veneered panels | Slower and easier to overheat if forced |
| Fiber cement | Usually low tooth count with specialized tooth design | Fiber-cement siding and board | Material-specific; dust control is critical |
| Metal cutting | Material-specific carbide or abrasive design | Approved metal stock | Sparks, chips, heat, and saw compatibility require extra care |
Match the blade to the saw and material
Confirm all of the following before installation:
- Blade diameter matches the saw’s rated capacity.
- Arbor hole matches the spindle.
- Blade RPM rating meets or exceeds the saw’s no-load speed.
- Rotation arrow points in the same direction as the saw’s rotation indicator.
- Blade is approved for the material.
- Teeth, plate, and carbide tips are not cracked, bent, or missing.
More teeth do not always mean a better blade. A high-tooth-count blade clears chips more slowly. When pushed aggressively through thick framing lumber, it may heat up, scorch the wood, and strain the motor.
How to Use a Skill Saw Guide Safely: Step by Step
Read the manual for your exact model before use. The following process supplements—not replaces—the manufacturer’s instructions.
1. Inspect the saw before every session
Disconnect the cord or remove the battery before touching the blade. Look for a damaged cord, loose shoe, cracked housing, missing fasteners, or guard debris. Confirm that the lower guard snaps closed without hesitation.
For a used saw, search its model and serial information in the U.S. Consumer Product Safety Commission recall database before use.
2. Dress for the work
Wear impact-rated eye protection and appropriate hearing protection. NIOSH’s power-tool noise resources identify circular saws as tools for which hearing protection may be needed. Avoid loose sleeves and jewelry, and tie back long hair.
OSHA notes that wood dust can irritate the eyes and respiratory system and is associated with more serious health effects. Use dust collection where possible and respiratory protection appropriate to the material and exposure. Fiber cement, painted lumber, and treated materials may create additional hazards; follow the material maker’s guidance.
Gloves can protect against splinters while handling lumber, but they are not a license to place a hand near a moving blade. Never hold a small workpiece in your hand while cutting it.
3. Inspect and support the workpiece
Check both sides of the path for fasteners, wiring, pipes, and clamps. Mark the waste side. Support the work so the blade cannot hit the bench or floor and the kerf—the slot made by the blade—cannot close and pinch it.
For a crosscut, secure the main piece and let the short waste end remain free. For sheet goods, rigid foam beneath the full panel can provide continuous support when used on a stable work surface.
4. Set the cutting depth
Set the blade so it projects only slightly below the workpiece—commonly about one tooth depth, subject to the manual and situation. Extra exposure does not speed the cut. Lock the depth lever before restoring power.
5. Position yourself before starting
Stand to one side of the blade path with balanced footing. Keep the cord, hose, and bystanders clear. Use both intended grips.
Rest the front of the shoe on the work without touching it with the blade. Align the cut-line notch or a secured guide.
6. Start and complete the cut
Bring the saw to full speed before entering the material. Keep the shoe flat and use steady, moderate pressure. If the cut drifts badly, release the trigger, wait for a full stop, and reset instead of twisting the saw.
If motor speed drops sharply, the feed may be too fast, the blade dull, the battery weak, or the kerf closing. Do not force the tool.
After clearing the work, release the trigger and maintain control until the blade stops and the guard closes. Never set down a coasting saw.
What Causes Kickback—and How Do You Prevent It?
Kickback occurs when the spinning blade becomes pinched, stalled, or misaligned and the saw reacts suddenly, often moving backward toward the operator. It is one of the most important circular-saw hazards to understand.
Common causes include:
- A closing kerf pinching the blade
- Twisting the saw during the cut
- A dull, warped, damaged, or incorrect blade
- Poorly supported sheet goods
- Starting with the blade touching the workpiece
- Cutting material that shifts unexpectedly
- Using excessive force instead of allowing the blade to cut
To reduce the risk, support the material so the cut opens rather than closes, keep both hands on the intended grips, maintain a straight cutting path, and stand outside the likely line of kickback. If the blade binds, release the trigger and hold the saw still until the blade fully stops. Do not pull a spinning blade backward out of the kerf.
How to Make Straight, Clean, and Repeatable Cuts
Use a speed square for crosscuts
A speed square can act as a short fence across dimensional lumber. Account for the blade-to-shoe offset, clamp the square when necessary, and keep the shoe against it.
Use a straightedge for long rip cuts
For panels, clamp a straight board, level, or purpose-built guide parallel to the cut. Measure from the blade—not the notch—to the guide-contact edge of the shoe, and ensure the motor and battery can pass the clamps. Test on scrap when dimensions matter, and keep the blade kerf on the waste side.
Reduce tear-out
On a conventional circular saw, teeth generally exit through the top, where splintering may be worse. When appropriate, place the best face down, use a sharp finish blade, support the cut, and avoid forcing the saw. A track saw may be more reliable for expensive veneered panels.
Approach bevel cuts carefully
Tilting the shoe reduces cutting depth and changes balance. Verify the angle on scrap, clamp the work, check motor clearance, and keep the usable shoe surface supported.
Treat plunge cuts as an advanced operation
A plunge cut starts inside a panel and requires deliberate guard control. Prefer a track saw, jigsaw, oscillating tool, or drilled starter hole when safer. If a circular-saw plunge cut is necessary, follow the exact model instructions.
Real-Life Skill Saw Guide Decisions
| Project | Practical setup | Why it works | When to choose another tool |
| Cutting framing lumber | 7-1/4-inch saw, framing blade, speed square | Portable and accurate enough for construction | Miter saw for many identical cuts |
| Breaking down cabinet plywood | Fine blade, full support, clamped straightedge | Controls a large sheet in a small shop | Track saw for frequent finished panels |
| Ripping deck boards | General-purpose blade and long guide | Works outdoors near the project | Table saw for repeated narrow strips |
| Trimming a door | Finish blade, straightedge, verified depth | Creates a controlled straight cut | Track saw for a high-value finished door |
| Cutting a notch | Straight cuts, then jigsaw or hand-tool cleanup | Combines speed and corner control | Avoid unstable freehand plunges |
Common Skill Saw Guide Mistakes
- Unsupported material: Sagging work can tear, fall, or trap the blade. Plan support before marking.
- Ignoring the kerf: Cutting on the keep side of the line makes the part undersized. Mark the waste side.
- One blade for every task: Use a fast blade for construction and a clean-cut blade for finish work.
- Trusting only the notch: It is a reference, not a guarantee. Keep the shoe against the guide.
- Forcing a dull blade: Burning, vibration, ragged edges, or unusual effort signal a problem.
- Defeating the lower guard: A sticky guard needs cleaning or service, never a tie-back.
- Ignoring what is below: Inspect the full path for supports, cords, hardware, and finished surfaces.
Maintenance That Extends Saw and Blade Life
Before maintenance, disconnect the plug or remove the battery.
- Blow or vacuum loose dust from vents without driving debris deeper into the motor.
- Remove pitch and resin from blades using a blade-safe cleaning method.
- Replace blades that are cracked, warped, missing teeth, or no longer cut properly.
- Check that depth and bevel mechanisms move smoothly and lock securely.
- Confirm the shoe is square to the blade at zero degrees; calibrate only as the manual directs.
- Inspect cords, plugs, battery contacts, and housings for damage.
- Store the saw in a dry place where the shoe and guard will not be bent.
- For worm-drive models, follow the manufacturer’s lubrication schedule; do not assume every gearbox uses the same oil or service interval.
Do not apply random lubricants near the blade or guard. Some products attract dust, contaminate workpieces, or conflict with the manufacturer’s specifications.
When a Skill Saw Guide Is Not the Best Choice
A circular saw is versatile, but versatility does not make it ideal for every cut.
- Choose a miter saw for numerous repeatable crosscuts or precise trim angles.
- Choose a table saw for controlled repetitive ripping when you have suitable infeed, outfeed, guarding, and training.
- Choose a track saw for clean, accurate sheet-good cuts and plunge cuts.
- Choose a jigsaw for curves, interior cutouts, and shapes.
- Choose a reciprocating saw for rough demolition where finish quality is unimportant.
- Choose an oscillating multi-tool for small flush cuts or restricted spaces.
- Choose a dedicated masonry or metal-cutting system when material hazards exceed the circular saw’s rating or dust-control ability.
The expert decision is not “Can I make this tool do it?” It is “Which tool lets me control the work, the blade, the debris, and the finished result?”
Expert Buying Recommendation
For a first all-purpose saw in the USA, begin with a well-balanced 7-1/4-inch sidewinder from a manufacturer with accessible blades, parts, service information, and warranty support. Choose corded power if most work happens near an outlet and long runtime matters. Choose cordless if mobility matters and you already own a suitable battery platform.
Before purchasing, pick up the tool—without activating it—and check whether you can reach the trigger, front grip, depth lever, and bevel lever without awkward wrist movement. Confirm that you can see the blade-side reference area from a normal, balanced stance. A saw that looks impressive on a specification chart can still be the wrong saw for your hands.
Do not spend the entire budget on the tool. Reserve money for two appropriate blades, eye and hearing protection, clamps, a straightedge, stable supports, and dust control. Those items improve real-world results more than a marginal increase in motor specifications.
Before choosing a skill saw, explore our guides on circular saw blade selection, corded vs. cordless tools, and how to cut plywood without splintering. These resources will help you select the right equipment and achieve cleaner, safer cuts.
For additional safety information, review the official circular saw guidance provided by OSHA and the Power Tool Institute. Always follow your saw manufacturer’s instructions before operating the tool.
Frequently Asked Questions
Is a skill saw the same as a circular saw?
In everyday U.S. usage, “skill saw” usually means a handheld circular saw. Circular saw is the generic category; SKILSAW is a brand name.
What is a Skill Saw Guide used for?
It makes straight crosscuts, rip cuts, bevels, and some controlled plunge cuts. Approved setups can also cut certain composites, plastics, metals, and fiber-cement products.
Is a Skill Saw Guide good for beginners?
Yes, if the user reads the manual, understands the guard and depth controls, supports the work, and practices simple guided cuts on scrap.
What size circular saw should I buy?
A 7-1/4-inch model is the versatile U.S. standard. A 6-1/2-inch cordless saw may feel lighter, but check depth and bevel capacity.
How deep can a 7-1/4-inch Skill Saw Guide cut?
Many can cut common 2-by framing lumber at 90 degrees in one pass, but capacity varies and decreases on bevels. Check the model manual.
Why does my circular saw kick back?
The blade may be pinched, twisted off line, damaged, or caught by shifting material. Correct support, a sharp blade, and a straight path reduce risk.
How many teeth should a circular saw blade have?
For a 7-1/4-inch saw, 18–24 teeth suit fast framing; roughly 40–60 teeth give cleaner plywood and finish cuts. Follow the blade maker’s guidance.
Can a skill saw cut metal?
Only when the saw and blade are approved for that metal. Hot chips or sparks require suitable PPE and fire precautions; dedicated equipment is often safer.
Conclusion
A skill saw earns its place in a workshop because it can make fast, useful cuts without demanding a large stationary setup. The best results come from matching the saw and blade to the project, supporting the material so the kerf stays open, setting a sensible blade depth, and guiding the tool with steady control.
For most people, a 7-1/4-inch sidewinder—corded for sustained shop work or cordless for mobility—is the practical starting point. Add quality blades, stable supports, a straight guide, and appropriate protective equipment. Most importantly, keep every guard operational and switch to a different saw when the cut exceeds your tool, setup, or experience. Accuracy matters, but control comes first.